2. Introduction (E-E-A-T & Engaging Hook)
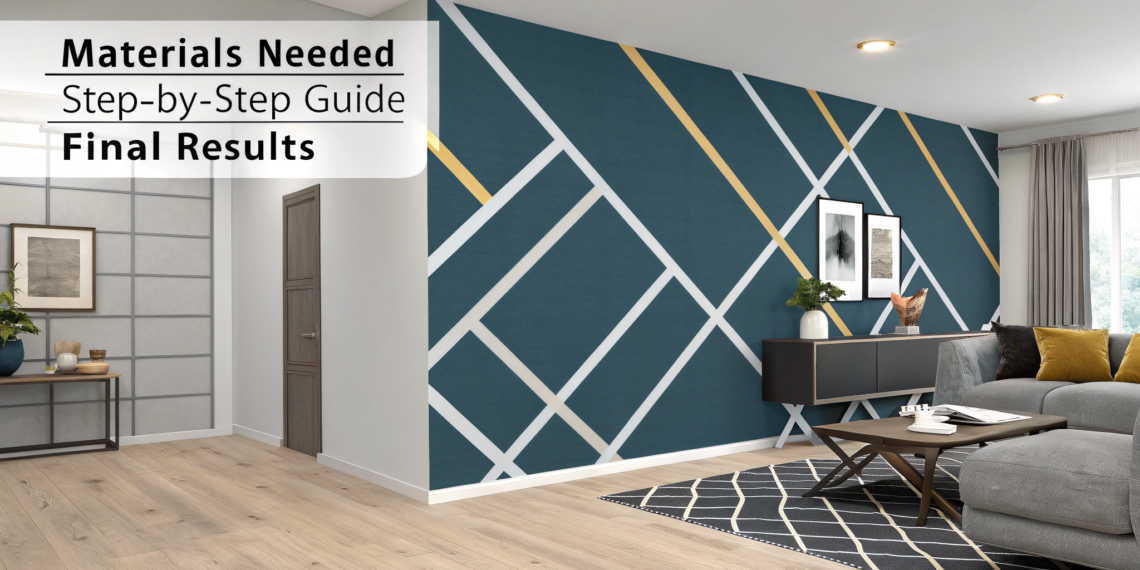
Accent walls are interior design powerhouses. They instantly add depth, texture, and a high-end, custom feel to any room—but usually, they come with a high price tag (think expensive wallpaper or complex woodwork). If you want that dramatic impact without the cost or hassle, the secret is simple: painters tape and paint. As a DIY enthusiast who has transformed dozens of spaces, I swear by the geometric tape method. It allows you to create sharp, professional-looking patterns—from modern chevrons to sleek diamonds—using just a ruler and some patience. This complete tutorial will guide you step-by-step on creating a stunning DIY accent wall using painters tape, proving that the most dramatic décor changes are often the cheapest ones.
Step 1: Planning and Prepping for Success
The key to a successful tape-based accent wall is thorough planning and surface preparation. Sloppy prep leads to bleeding lines.
Choosing Your Design and Colors
- Design Selection: Start simple. Geometric patterns (random triangles, chevrons, or diamonds) are easiest. Avoid curves!
- Color Strategy: Always choose two colors: a Base Color (the wall color or a light neutral) and an Accent Color (the bolder color you will paint over the tape).
- E-E-A-T Tip: For the boldest look, choose a matte finish for your base and a semi-gloss finish for your accent color. The difference in sheen adds an extra layer of subtle texture and depth.
Preparing the Surface
- Clean: Wipe the entire wall surface down with a damp cloth or a slightly soapy sponge to remove dust and grease. Let it dry completely.
- Base Coat: Ensure your entire wall is painted in the Base Color and is completely dry (wait at least 24 hours). The base must be perfect, as this is the color that will show through your design.
Step 2: Mapping and Taping the Geometric Grid
This is the most time-consuming but crucial step. Patience here equals perfect results later.
Drawing the Layout
- Start with the Center: Use a pencil and a long level or yardstick to lightly mark the center point of your wall.
- Measure and Mark: Decide on the width of your geometric shapes (e.g., 18 inches). Mark light pencil dots horizontally and vertically across the wall to create a rough grid. Keep these lines very light.
- The Angle: If you are doing a chevron or diamond pattern, the 45-degree angle is easiest to maintain. Use a protractor or a pre-cut cardboard triangle as a stencil.
Applying the Painters Tape
- Tape Placement: The tape must sit inside the lines you drew. The pencil lines are guides for the edge of your tape.
- Press and Seal (Crucial Step): After laying the tape in your pattern, use a credit card or a plastic putty knife to press firmly along both edges of every single piece of tape. This ensures a tight seal against the base coat and prevents paint bleeding.
- Real-World Tip: When two tape lines intersect, use a utility knife to lightly cut away the overlapping tape so all pieces lie completely flat against the wall.
Step 3: The Secret to Zero Bleed Lines
The biggest fear in this project is paint bleeding under the tape. Professionals use a simple “sealing coat” to guarantee sharp, crisp lines.
The Clear Sealing Coat
- The Sealer: After the tape is applied and pressed down, take a small amount of your Base Color paint (the wall color) and lightly paint a thin layer directly over the edges of the tape.
- Why It Works: Any small gap under the tape will now be filled with the base color. When this sealing coat dries, it creates a dam. If the accent color tries to bleed through, it hits the dry sealing paint instead of the white wall.
- Wait Time: Let the sealing coat dry completely (about 1–2 hours).
Applying the Accent Color
- Roll and Cut: Apply 2–3 thin coats of the Accent Color over the entire taped design. Use a small brush to “cut in” around the edges of the tape and a roller for the main sections.
- Keep Coats Thin: Heavy coats take longer to dry and can sometimes pull the tape off the wall when removed.
Step 4: The Big Reveal and Clean-up
The timing of the tape removal is essential for achieving perfect results.
The Tape Removal Rule
- When to Remove: Remove the tape while the final coat of the Accent Color is still wet. If you wait for the paint to cure, the film of paint will bridge the gap between the tape and the wall, and the dry paint will chip or tear when the tape is pulled off.
- The Angle: Pull the tape off slowly at a 45-degree angle, pulling away from the freshly painted section.
Quick Fixes for Minor Bleeds
- Fixing a Feathered Edge: If you have a small section where the paint bled, do not panic. Wait until the wall is completely dry. Use a fine-tipped artist’s brush and a small amount of the Base Color paint to carefully touch up the bleed line.
- Internal Link: [Anchor text: “selecting the perfect color palette” to a Home Decor post on selecting the best paint finishes for different rooms].
Beyond Geometric: Tape Ideas for the Next Level
Once you master the basic grid, you can use painters tape to create more complex, high-impact looks.
- Stripe Variations: Use tape to create stripes of different widths, painting every other stripe in your accent color.
- Faux Board and Batten: Use wider 1.5-inch tape to mimic the grid lines of board and batten. Paint the entire wall and remove the tape for a stunning vertical pattern that looks like texture. (Internal Link Opportunity: Link to a ‘DIY Projects’ post about faux wainscoting techniques).
- Tape and Texture: Apply the tape, then use a trowel to apply a thin layer of joint compound in the spaces between the tape lines. Remove the tape, and you have a wall with raised, textured squares.
4. FAQ Section (Ready for Schema Markup)
Q: Which type of painters tape is best for geometric walls?
A: Use a medium-adhesion blue or green painters tape (like FrogTape or professional 3M brands). Avoid low-adhesion tape (it won’t seal properly) and high-adhesion tape (it can pull the base paint off the wall). The tape should be $1$-inch wide for most patterns.
Q: Should I use a level for every line?
A: Yes, absolute precision is required. Use a long (4-foot) level to verify all horizontal and vertical lines are perfectly straight. For diagonal lines, use a reliable protractor or laser level for consistency across the entire wall.
Q: What is the biggest mistake beginners make with this project?
A: The single biggest mistake is not sealing the tape edges. Failing to apply a thin coat of the base color over the tape guarantees paint bleeding. That extra hour of sealing work saves five hours of painstaking touch-ups later.
Q: Can I use this technique on a textured wall?
A: It is difficult. The sealing coat is even more essential on textured walls (like orange peel or knockdown) to fill all the tiny gaps under the tape. Use FrogTape (which reacts to moisture to seal itself) and apply the sealing coat very generously.
Q: My wall looks uneven after I removed the tape. What happened?
A: This usually happens if you waited too long to remove the tape. When paint dries, it shrinks and forms a bridge. When you pull the dry tape, the bridge tears unevenly. Fix it by touching up the edges with the appropriate color using a tiny artist’s brush.
Q: Do I need to prime the wall before painting the accent color?
A: If you are painting the new accent color over a well-painted base color (even if it’s the same color), priming is usually unnecessary. However, if the accent color is very dark (like black) and the base is very light (like white), two thin coats of the accent color will be required.